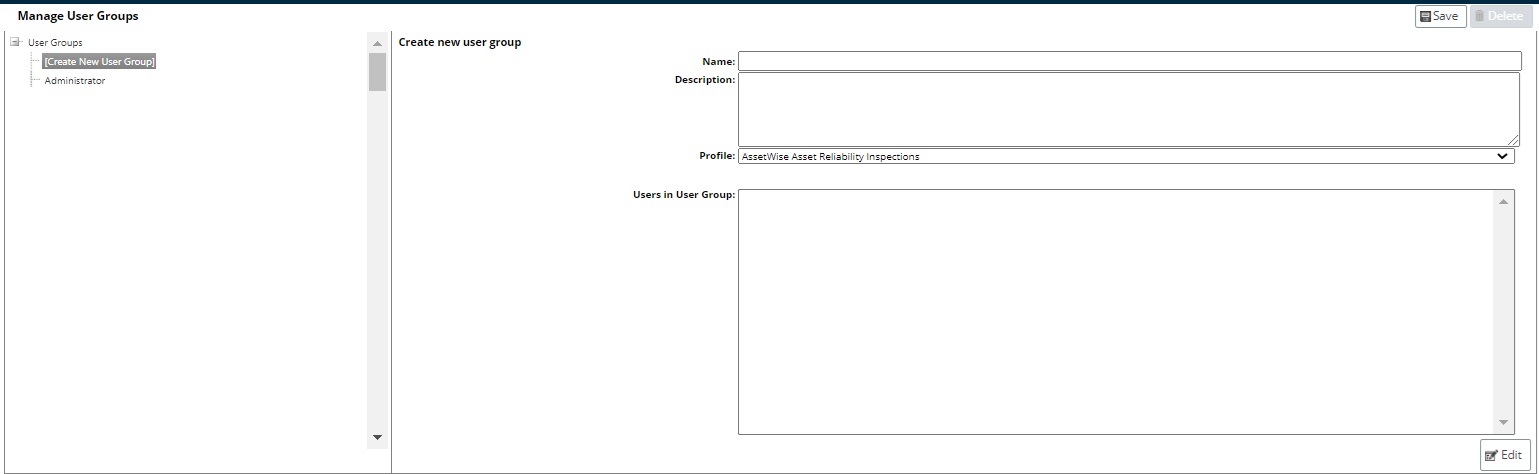
Create New Role
The administrator can create as many roles as desired, but it is recommended that four roles be created to represent the users of each module, as pictured above. To create a new role, select [Create New Role] to begin the setup:

Role Name and Description
The Role Name textbox is used to enter the name of the role that will be used throughout AssetWise Inspections. The name should be indicative of the type of users that will encompass the role.
The Description textbox is used to provide further details and explanation into the design and purpose of the role.
Module Access
Assigning a role’s module access is critical to controlling system security. Use the Module checkboxes to select which modules will be available to the users within the selected role.
Example: The default Inspector role is setup to only allow those users to access the Collector module. Inspectors typically do not need the tools within the Maintenance, Manager, and Administration modules, and therefore those modules are not checked.
Default Asset Permissions
Asset access can be determined through user groups or supplemental security, but the asset permissions are determined by a user’s role.
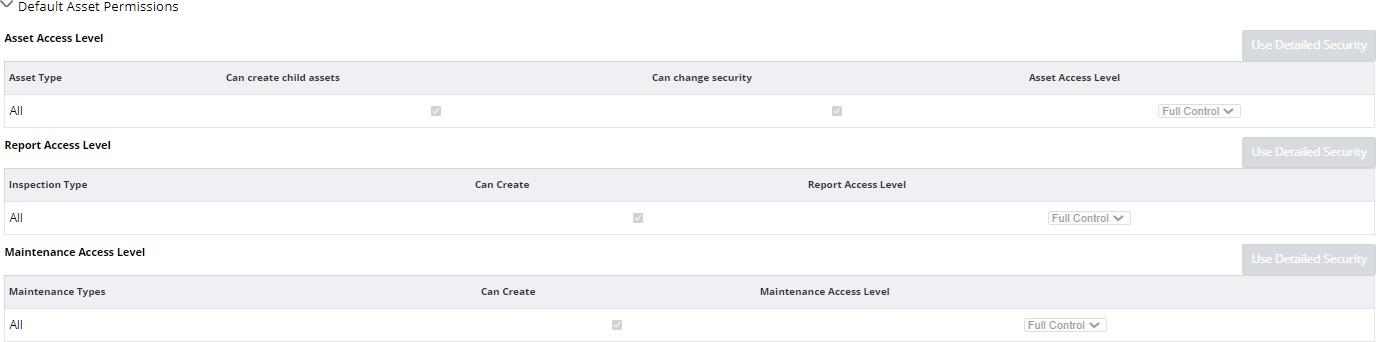
Asset Access Level
The Asset Access Level controls determine the role's access to assets, ability to create child assets, and ability to change security aspects.
For the Asset Access Level dropdown, Full Control enables users to update the values for assets, whereas Read-only simply permits the user to view the values.
Clicking the Use Detailed Security button allows the user to make the Asset Access Level controls selections for each asset type within the system:

To return to the simple, all-encompassing view, click the Use Simple Security button. Before returning, a warning message will appear:

Report Access Level
The Report Access Level controls determine the role's ability to create and access inspection reports.
For the Report Access Level dropdown, Full Control enables users to edit the values for reports, whereas Read-only simply permits the user to view the reports without editing values.
Clicking the Use Detailed Security button allows the user to make the Report Access Level controls selections for each inspection type within the system:

To return to the simple, all-encompassing view, click the Use Simple Security button. Before returning, a warning message will appear:

Maintenance Access Level
The Maintenance Access Level controls determine the role's ability to create and access maintenance items.
For the Maintenance Access Level dropdown, Full Control enables users to edit the values for maintenance items, whereas Read-only simply permits the user to view the maintenance items without editing values.
Clicking the Use Detailed Security button allows the user to make the Maintenance Access Level controls selections for each maintenance type within the system:

To return to the simple, all-encompassing view, click the Use Simple Security button. Before returning, a warning message will appear: